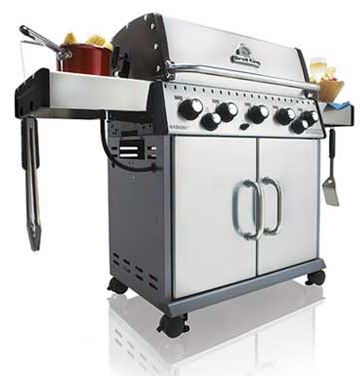
First off check your propane tank to make sure you have plenty of gas. Also check to make sure your tank is not rusted or damaged. Next take a close look at your LP gas hose and regulator. Check for cracks, cuts, abrasions or kinks of any kind. If you see any of this type of wear go ahead and replace the hose and regulator assembly.
Now while your grill is cool, go ahead and clean the inside of your grill. Use some type of gloves as this is a fairly dirty and messy process. Using whatever type of cleaning brush you desire, clean the cooking grates from front to back. Flip the grates over and do the same to the bottom side of the cooking grates. Once you have completed this step, remove the cooking grates from the grill and set them aside. Make sure to set them on some newspaper or some other kind of scrap material to prevent grease and oil from staining your patio or deck.
Either using the same cleaning brush or some type of flat scraper, clean all excess grease and debris off the top and bottom of your heat tents. If your grill has porcelain coated heat tents I would recommend using a cheap plastic putty knife as this will not damage the surface. You can scrape the debris off directly into an open trash can. Once you have finished cleaning the heat tents, set them on top of the cooking grates.
Using the plastic putty knife, scrape any excess grease and debris from the inside of the firebox into the bottom of the firebox. This would include the cooking grate ledges, heat tent ledges any flat spots on the burners, etc.
At this point check your main burners. Check the overall condition of your burners, looking for any rust through (surface rust is fine and very common but not to be worried about), cracks or breaks. If you see any of these issues go ahead and replace the burner or burners that have these issues. Also check to make sure that none of the burner ports (holes) are clogged. If they are, you can use a paperclip to clean the holes. Never use a toothpick or anything that could break off inside of the burner. It is also a good idea to remove each burner to make sure that spiders or other creatures have not clogged the burner or air vents with nests and debris. Follow the instructions in your owner’s manual for proper removal and replacement procedure.
Next, check to make sure that there is a spark at each electrode when you push your ignition button (this may be difficult to see on a bright sunny day). If not, you may need to clean the electrode tips and the sides of the burner next to the electrode to get a better spark. You can use an Emory cloth or Scotch Bright pad to accomplish this. Also check to make sure that the gap (or space) in between the electrode tips and burners are about the same on all of your ignition points. If there is a difference between these gap sizes you will not get proper spark at every point. Typically this can be adjusted by lightly pushing the electrode tip in or out as necessary. Be cautious when doing this because you do not want to break the electrode.
Once you have completed these step you will need to proceed in one of two ways depending on how your grill is constructed:
- If your grill has a removable grease tray and grease cup at the bottom of the firebox then remove and empty the grease cup first. Then remove the grease tray and hold it over a large open trash can, scrape all of the excess grease and debris off using the plastic putty knife. Once you have finished cleaning the grease tray, reinstall it into your grill along with the grease cup.
- If your grill does not have a removable grease tray then remove and empty the grease cup first. Reinstall the grease cup and then you will need to scrape any excess grease and debris off the bottom of the firebox and into the grease cup using the plastic putty knife. You may need to empty and replace the grease cup several times depending on how much debris is in the bottom of your firebox.
Now put your heat tents and cooking grates back in place and you are ready for your first barbeque of the season… Enjoy!!
For more information on grills, propane and supplies, contact West Sport in Sudbury.
landmann-usa.com

Comments
{tag_commentlist}